How to Use Drag and Drop
Drag and drop is a powerful feature, which helps you to organize your day. You can use drag and drop to reschedule existing tasks, move tasks between your inbox and timeline, or create and delete tasks quickly.
Please note that some drag and drop features are not available on 🤖 Android and 🌐 Structured Web yet but will be available soon.
This article covers information about:
(1) Move Tasks in Your Timeline
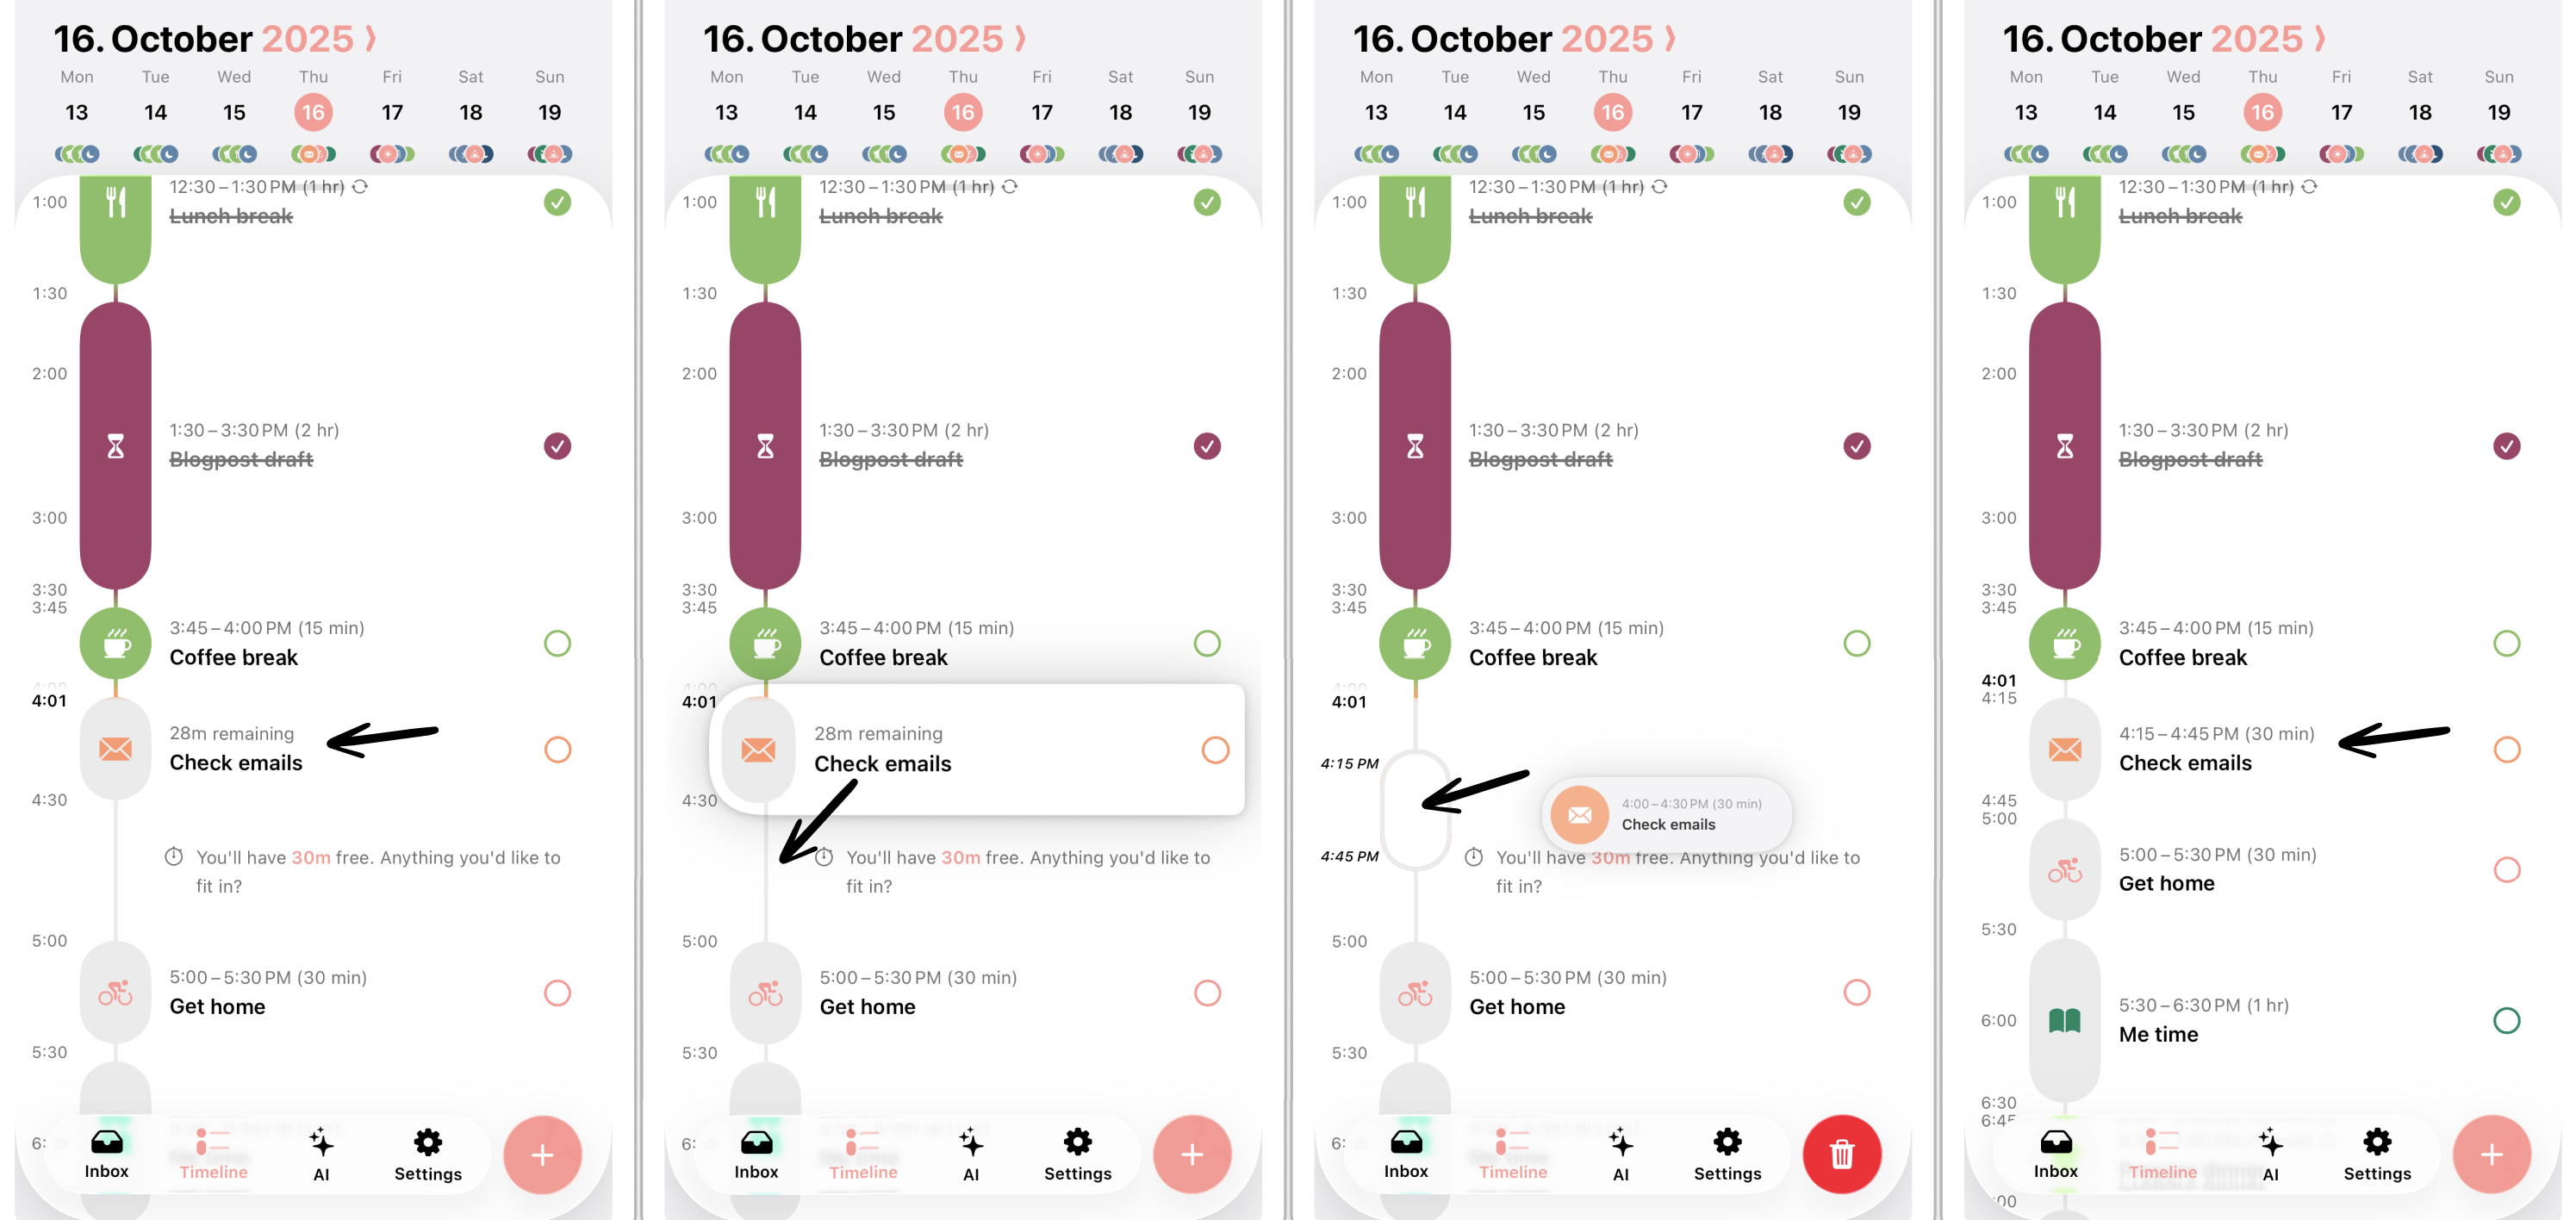
(1.1) Change Time or Day of Task
When your plans change because your coffee break takes longer than expected, you can easily drag a task to a new time slot or day. While dragging, a little preview will show, at which time the task will be dropped.
By dropping a task onto a day in the overview, it will automatically get moved to that day, while the time remains the same. You can also hover above the day for a few seconds, and it will automatically switch to that day. That way, you can drop it into a free time slot of your choice.
(1.2) Make Timeline Task an All-Day Task
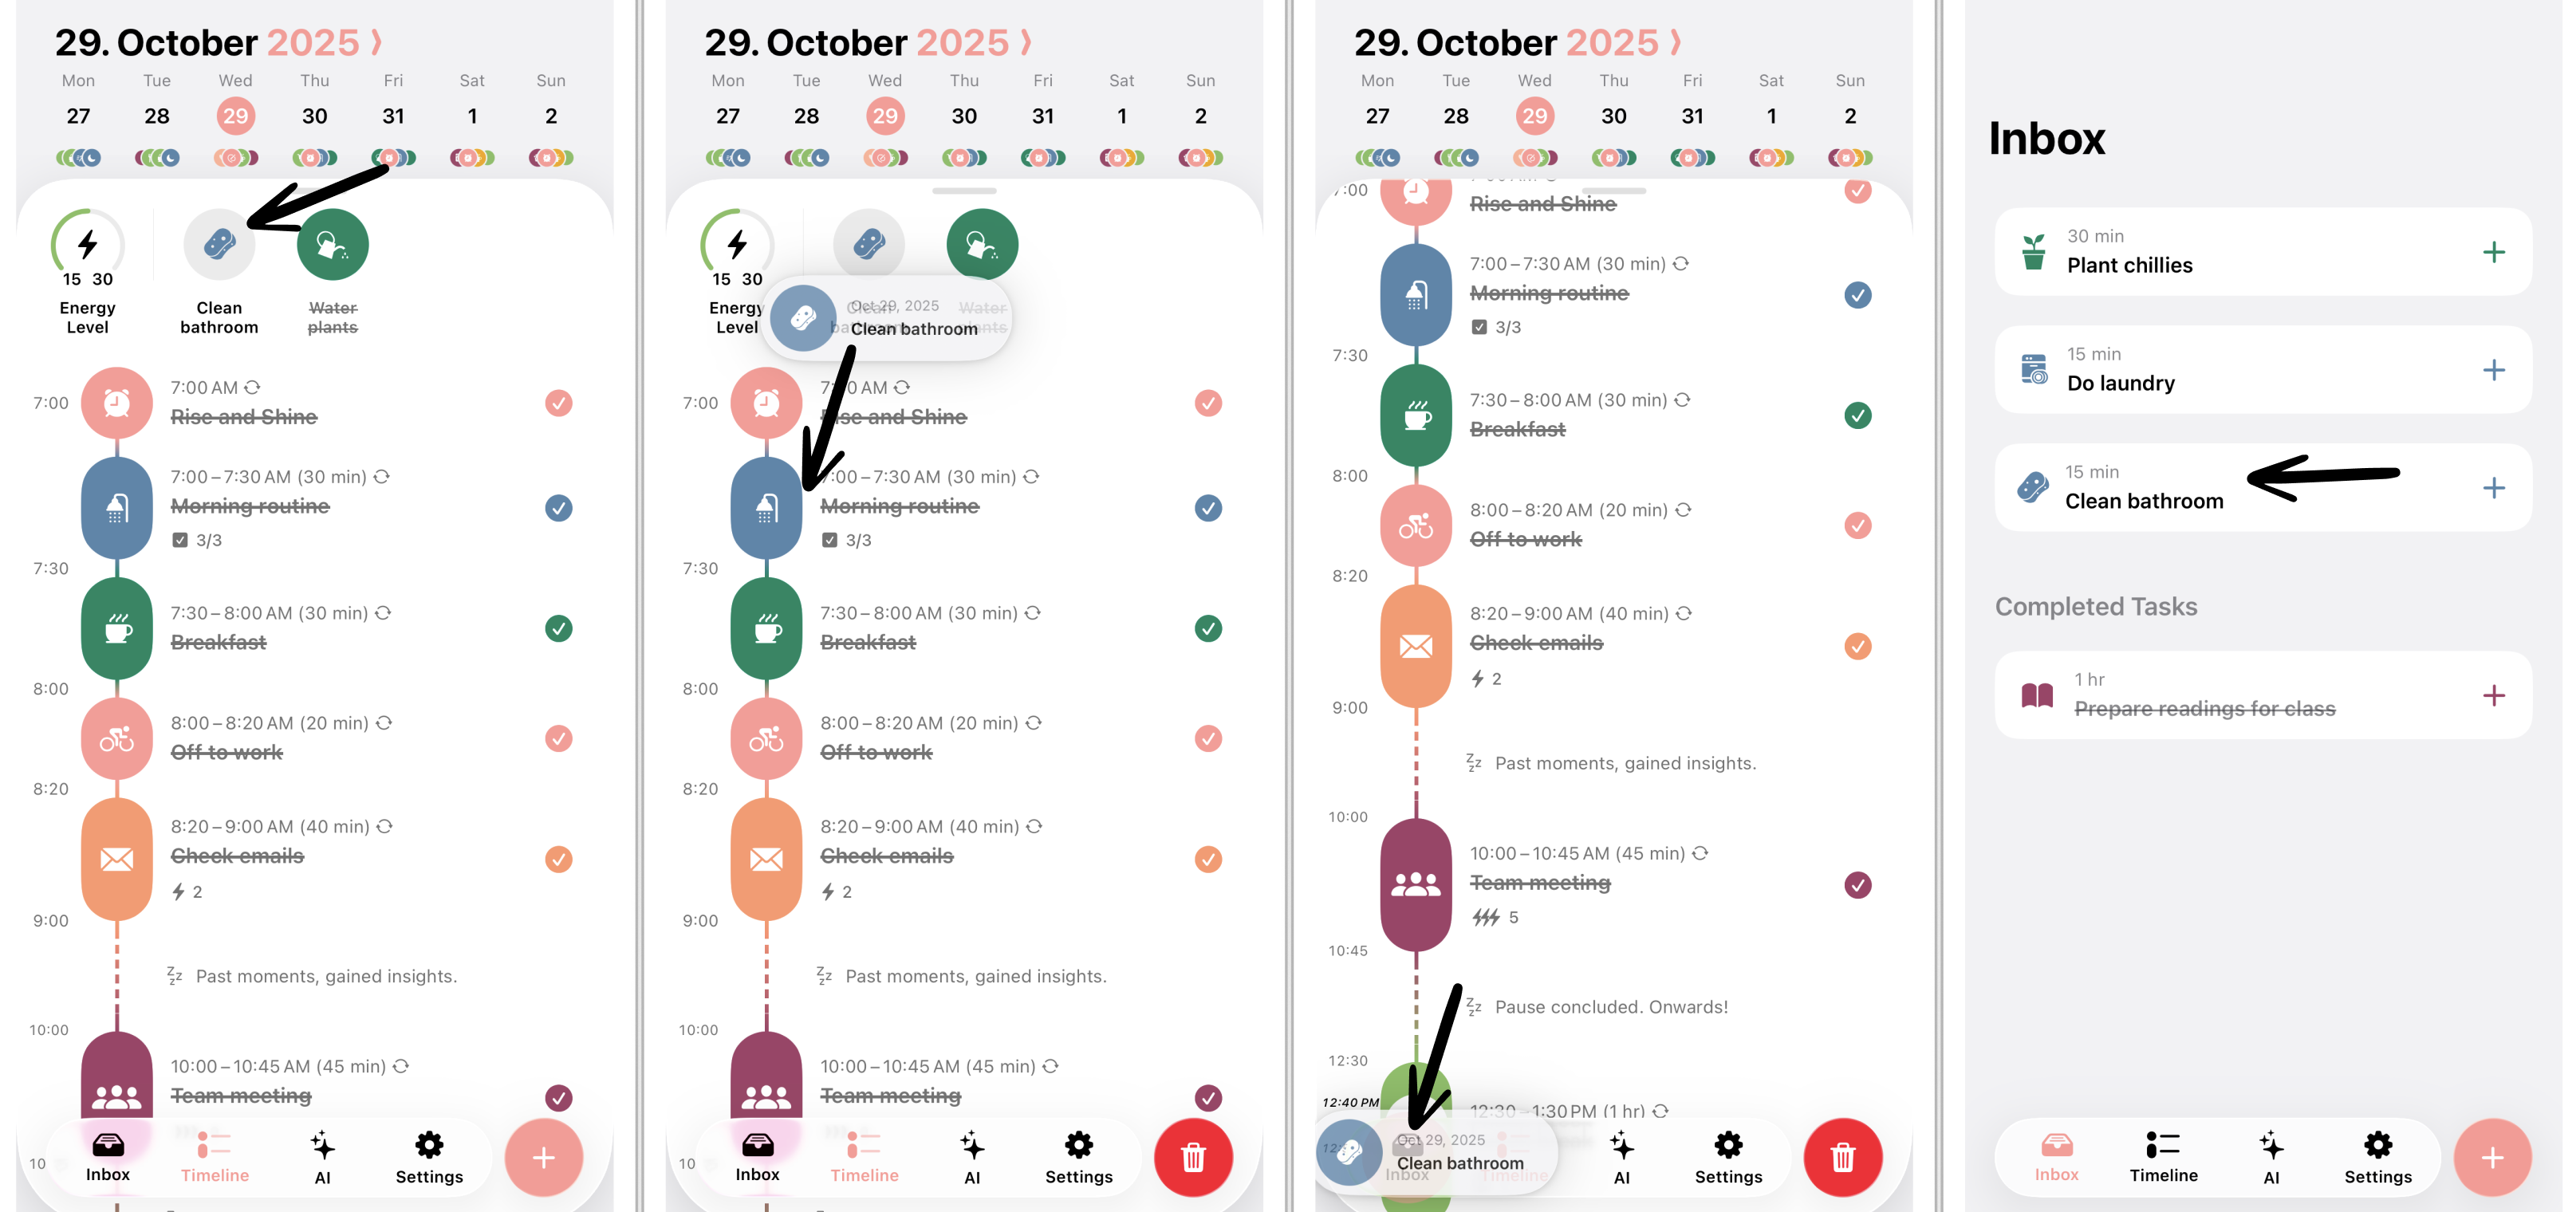
By dragging a task to the top of your timeline, you can also convert a timeline task to an all-day task.
💡 If you have multiple all-day tasks, you can use drag and drop to reorganize them by dragging them horizontally.
(1.3) Make All-Day Task a Timeline Task
You can do the same the other way around if you want to schedule an all-day task at a specific time. Simply drag the all-day task to your timeline and drop it at your preferred time.
(1.4) Move Tasks Between Timeline and Inbox
When you do not manage to finish a task, you can push it into the inbox to reschedule it later.
Drag the task over the Inbox icon at the bottom of the screen. By hovering over the Inbox icon for a few seconds, the inbox will open, and you can drop the task at a specific place in your inbox.
To move a task from your inbox to the timeline, drag the task over the Timeline icon at the bottom of the screen. By hovering over the Timeline button for a few seconds, the daily timeline view will open, and you can drop the task at a specific time in your timeline or make it an all-day task as described above.
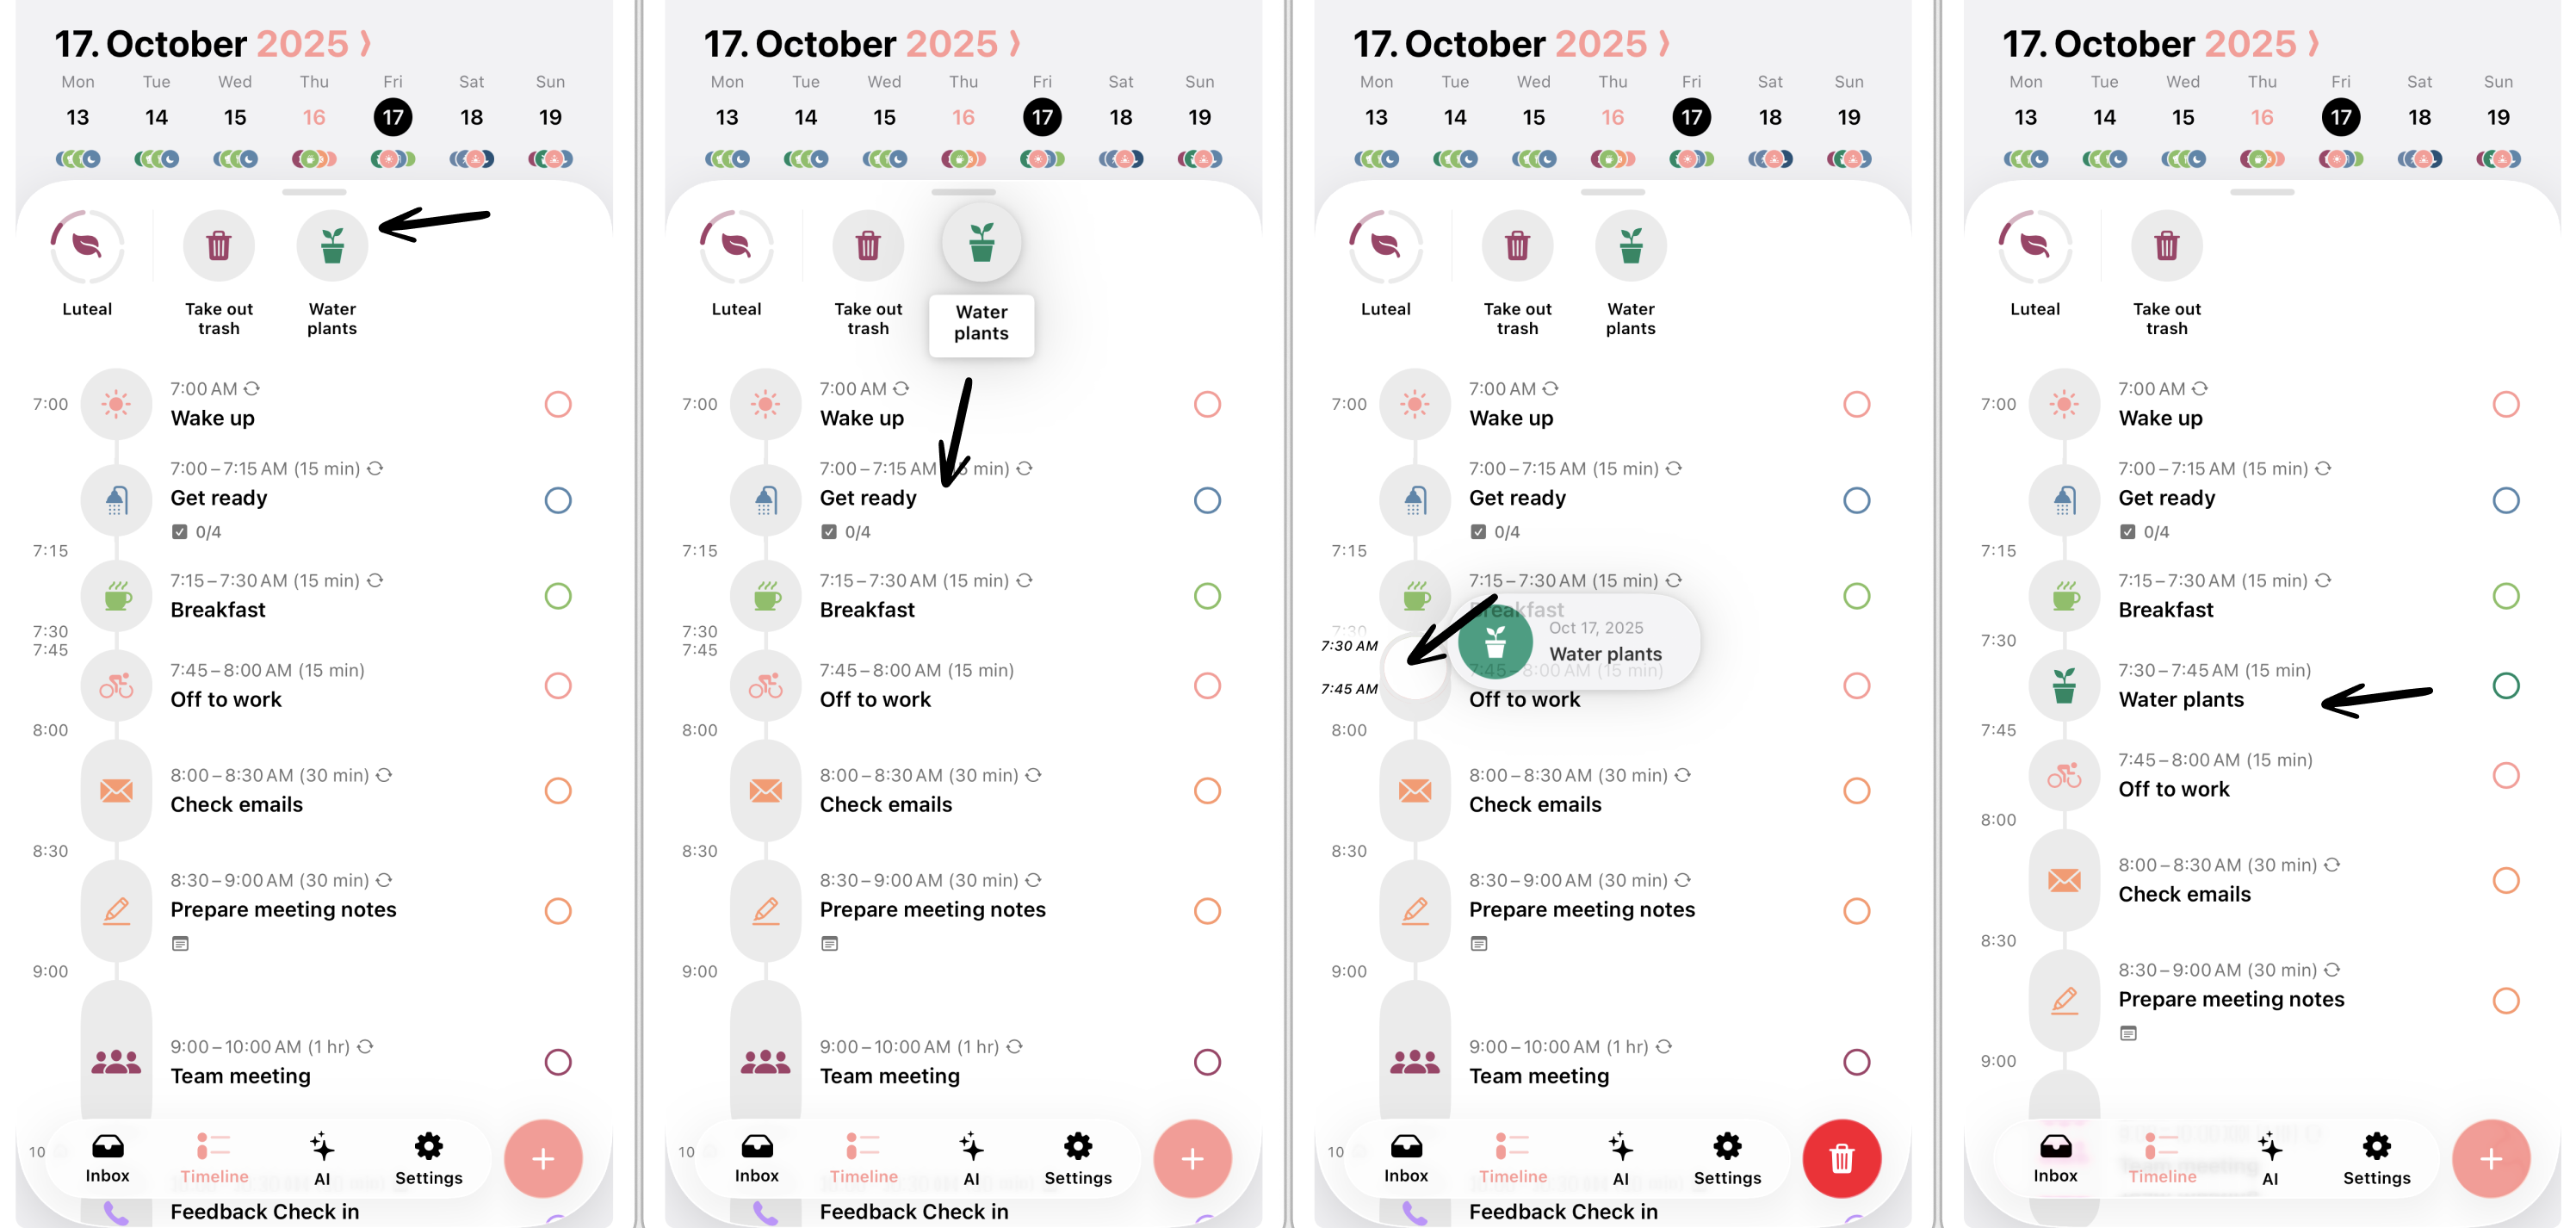
(2) Reorganize
(2.1) Reorganize All-Day Tasks
You can also reorganize the order of your all-day tasks, e.g., if you intend to push finished tasks at the end of the row. Simply drag and drop the tasks horizontally into your preferred order.
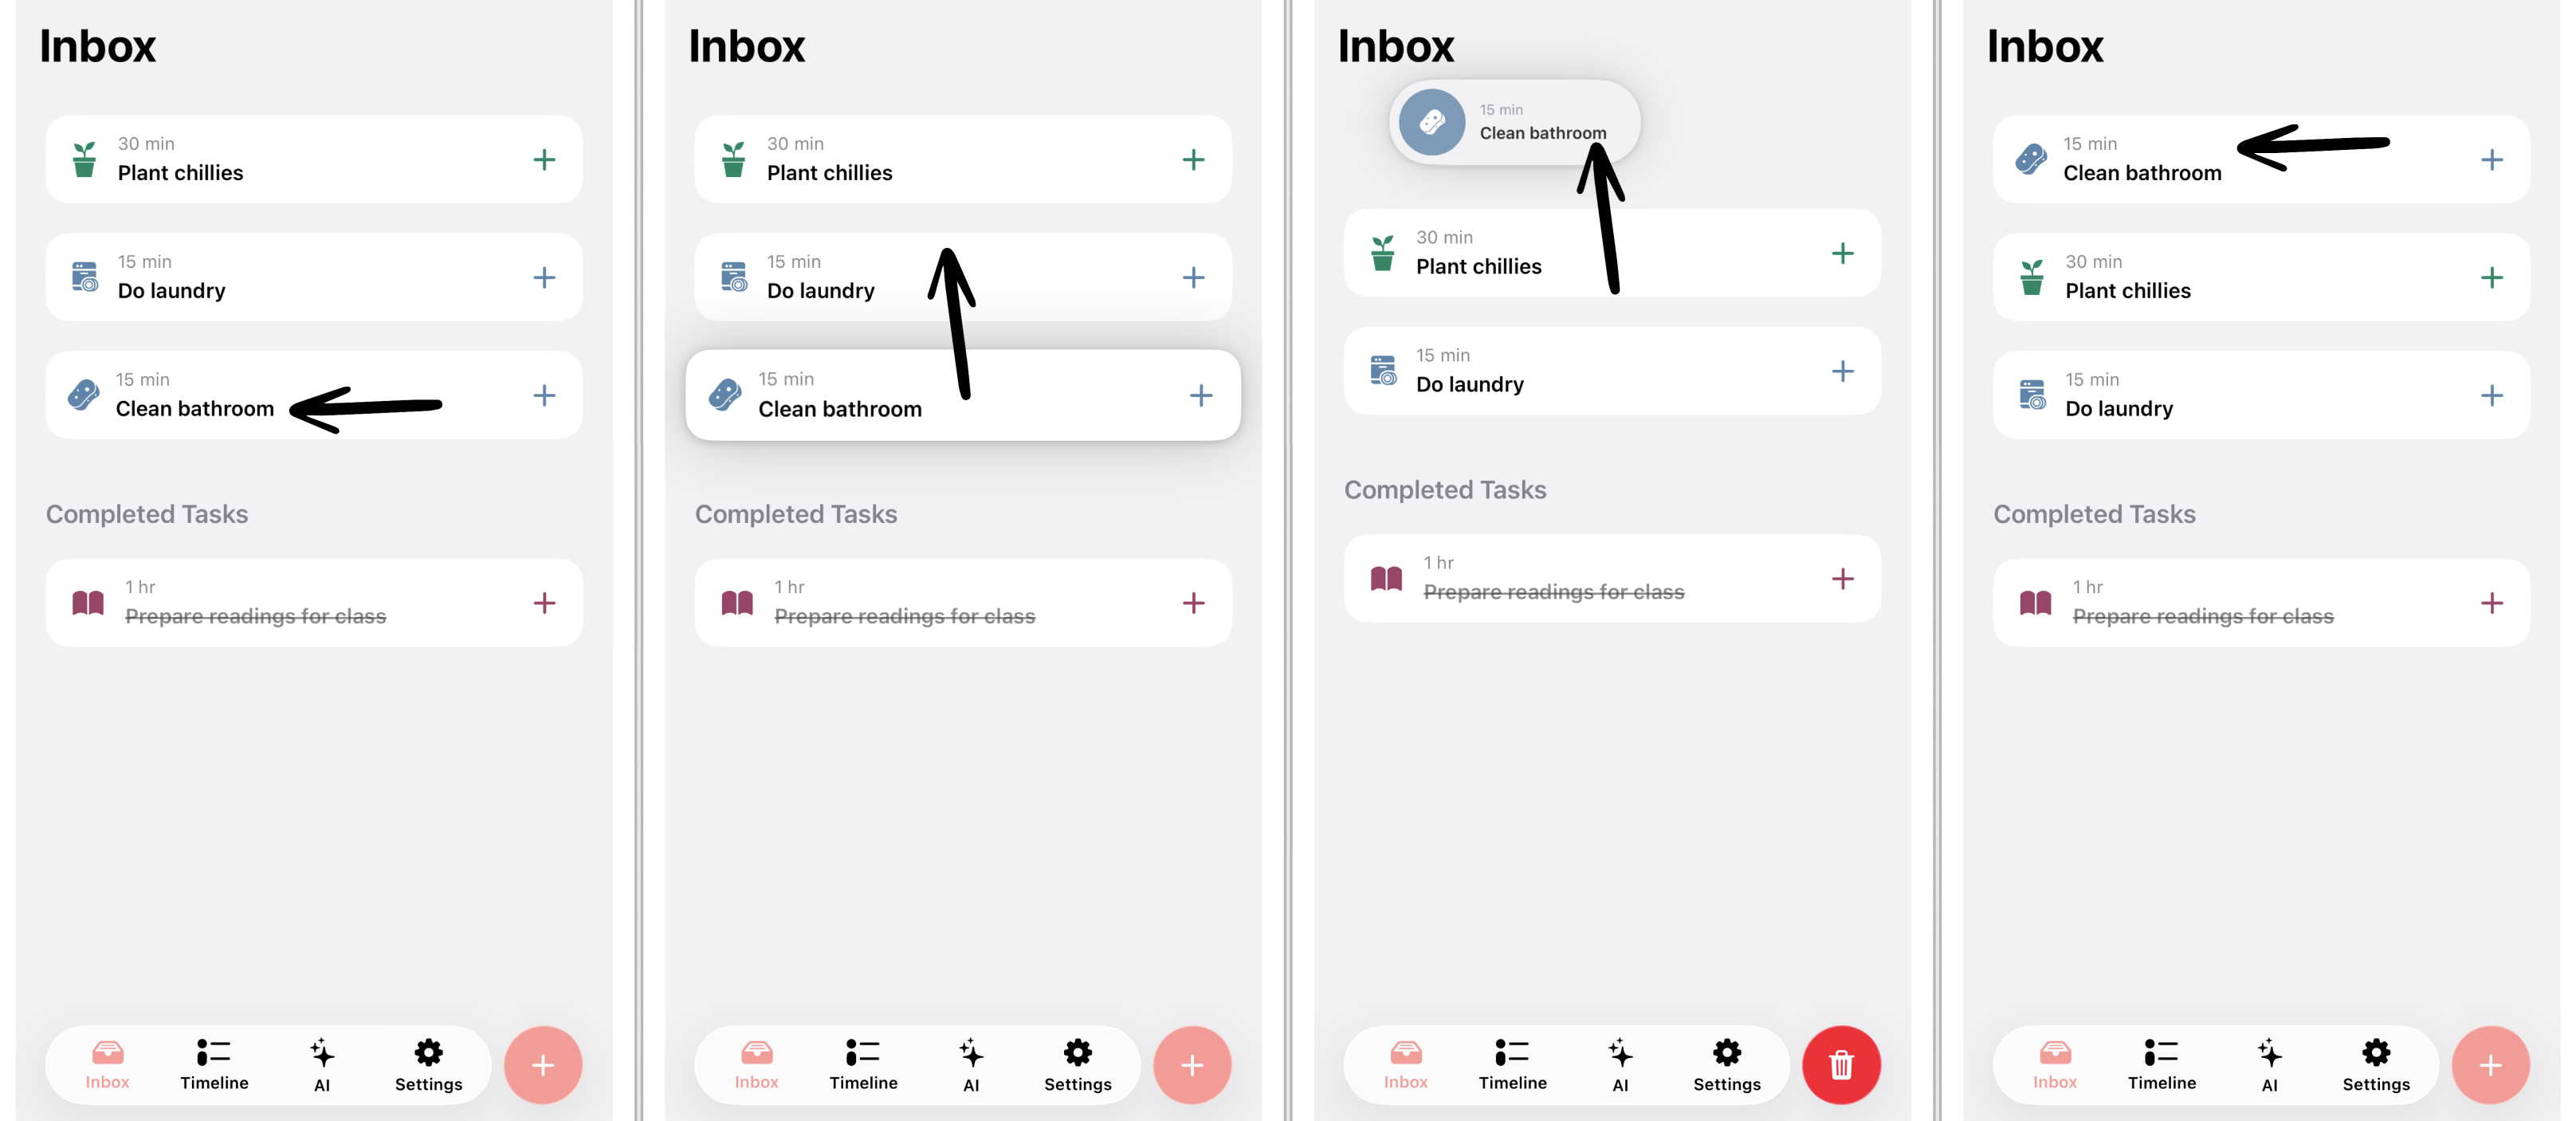
(2.2) Reorganize Inbox
You can also use drag and drop to easily reorganize your inbox. Simply drag the most important or urgent tasks to the top while leaving the insignificant ones at the lower end. When you have completed a task, drag it to the bottom part of your inbox, and it will automatically be checked off.
(2.3) Reorganize Subtasks
You can also reorganize subtasks using drag and drop. Simply open the task editor of the respective task, scroll down to the subtask section, and drag and drop the subtasks in your preferred order.
(3) Create Tasks
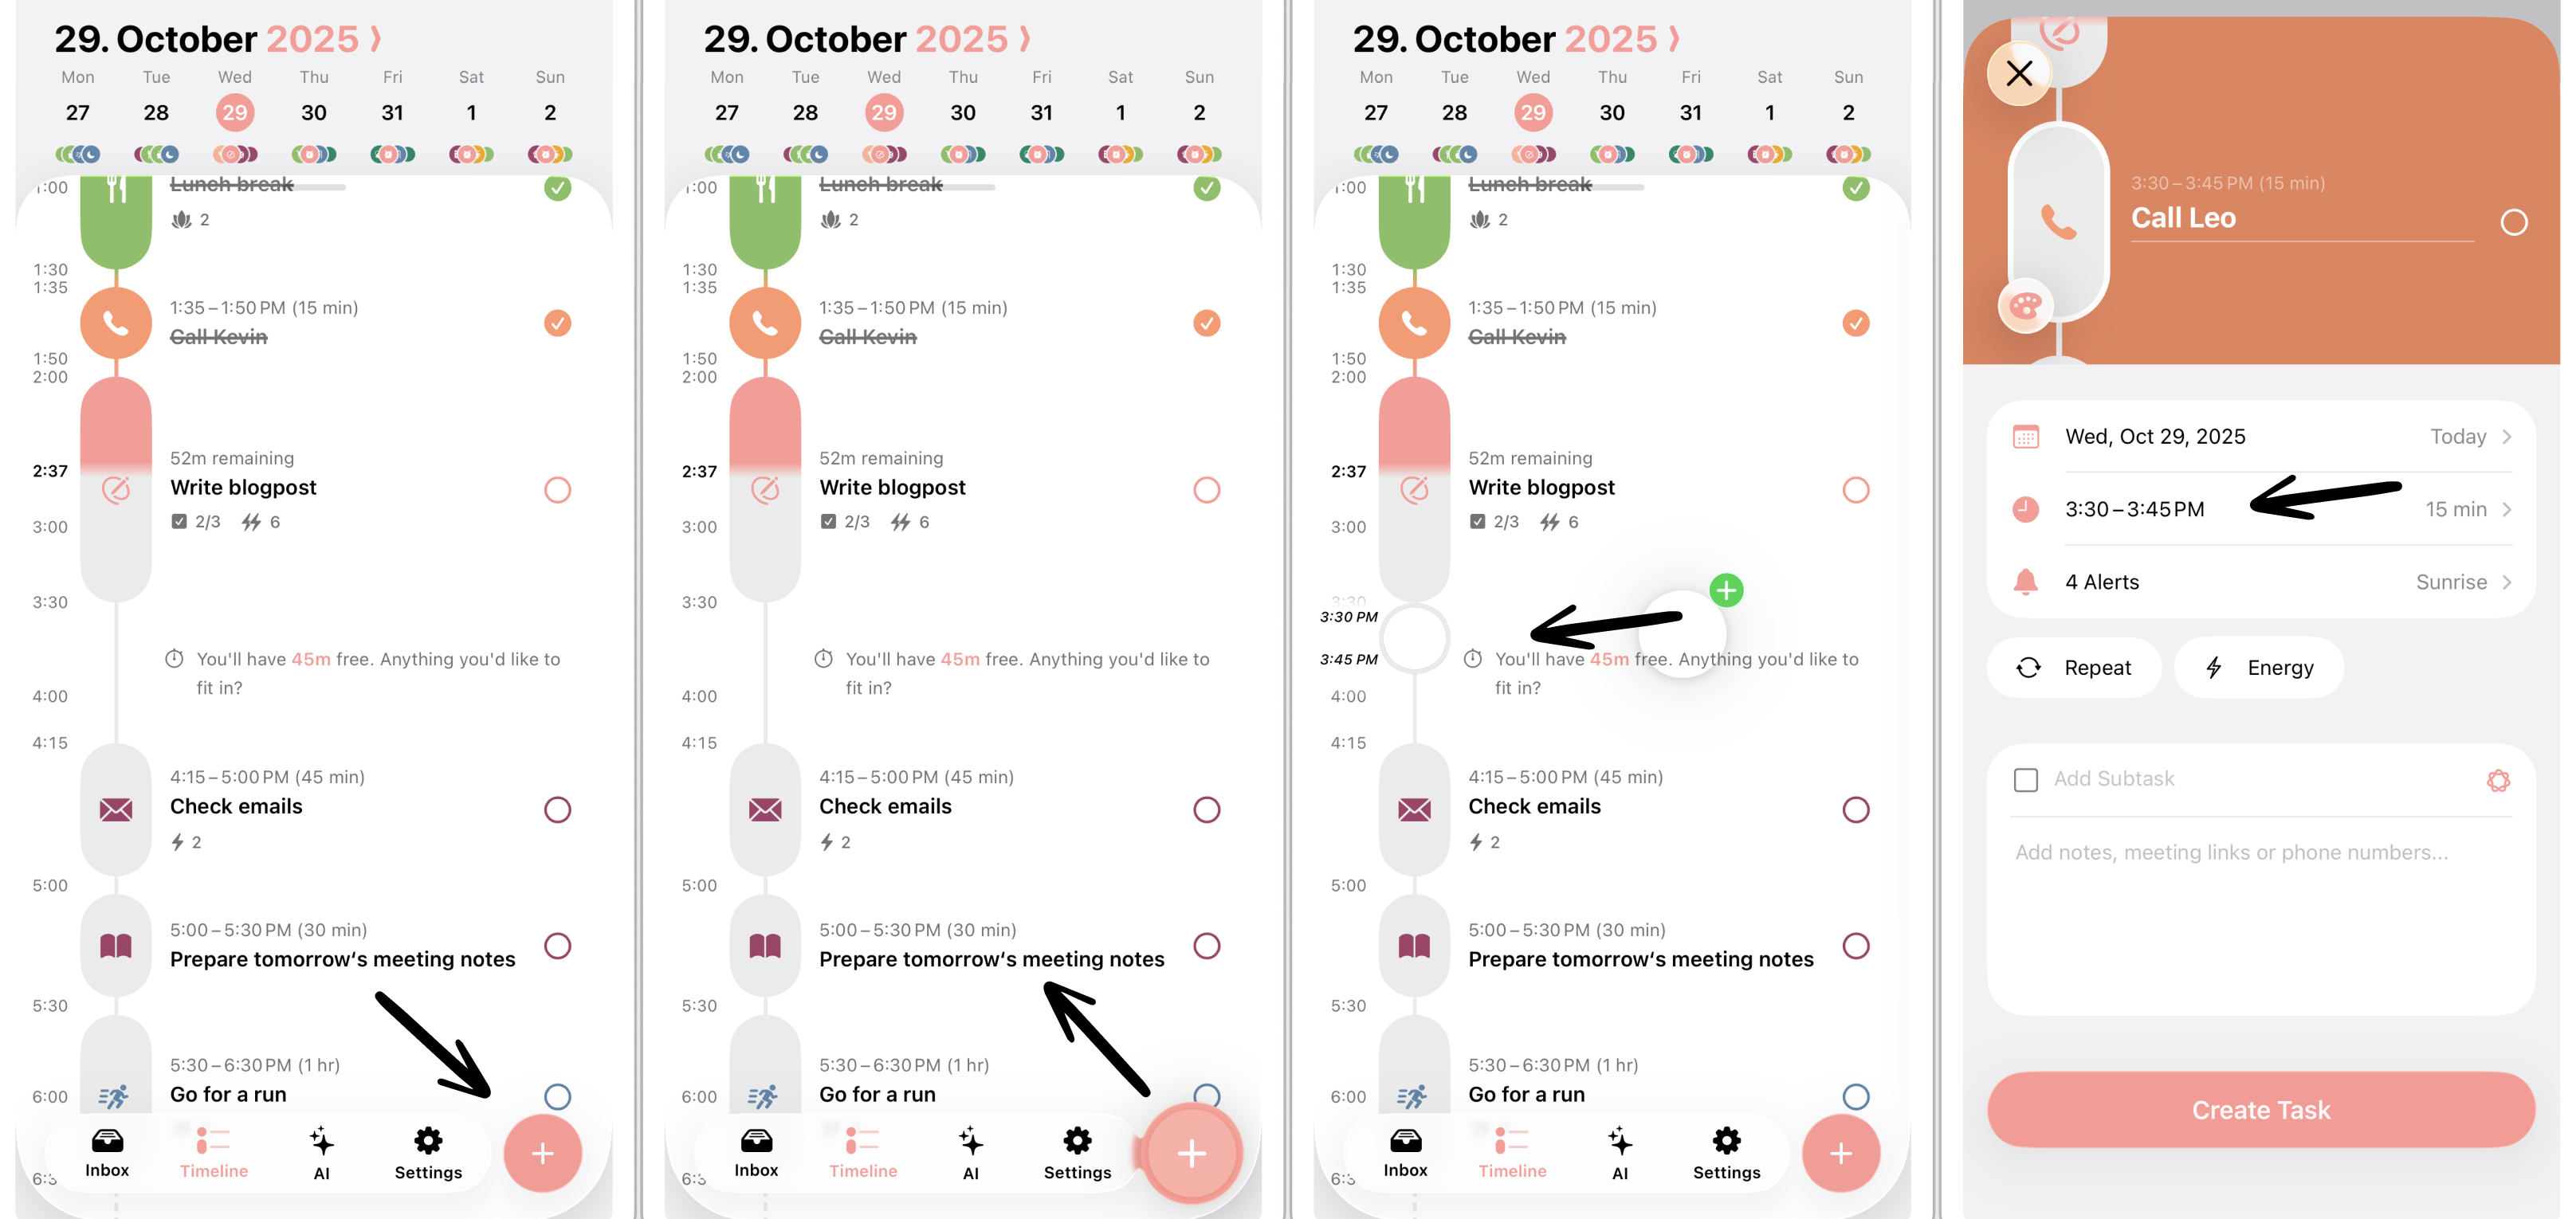
(3.1) Create Timeline Tasks
To create a timeline task using drag and drop, simply drag the + Plus button in the top-right corner over your timeline and drop it at the time you intend to start the newly created task.
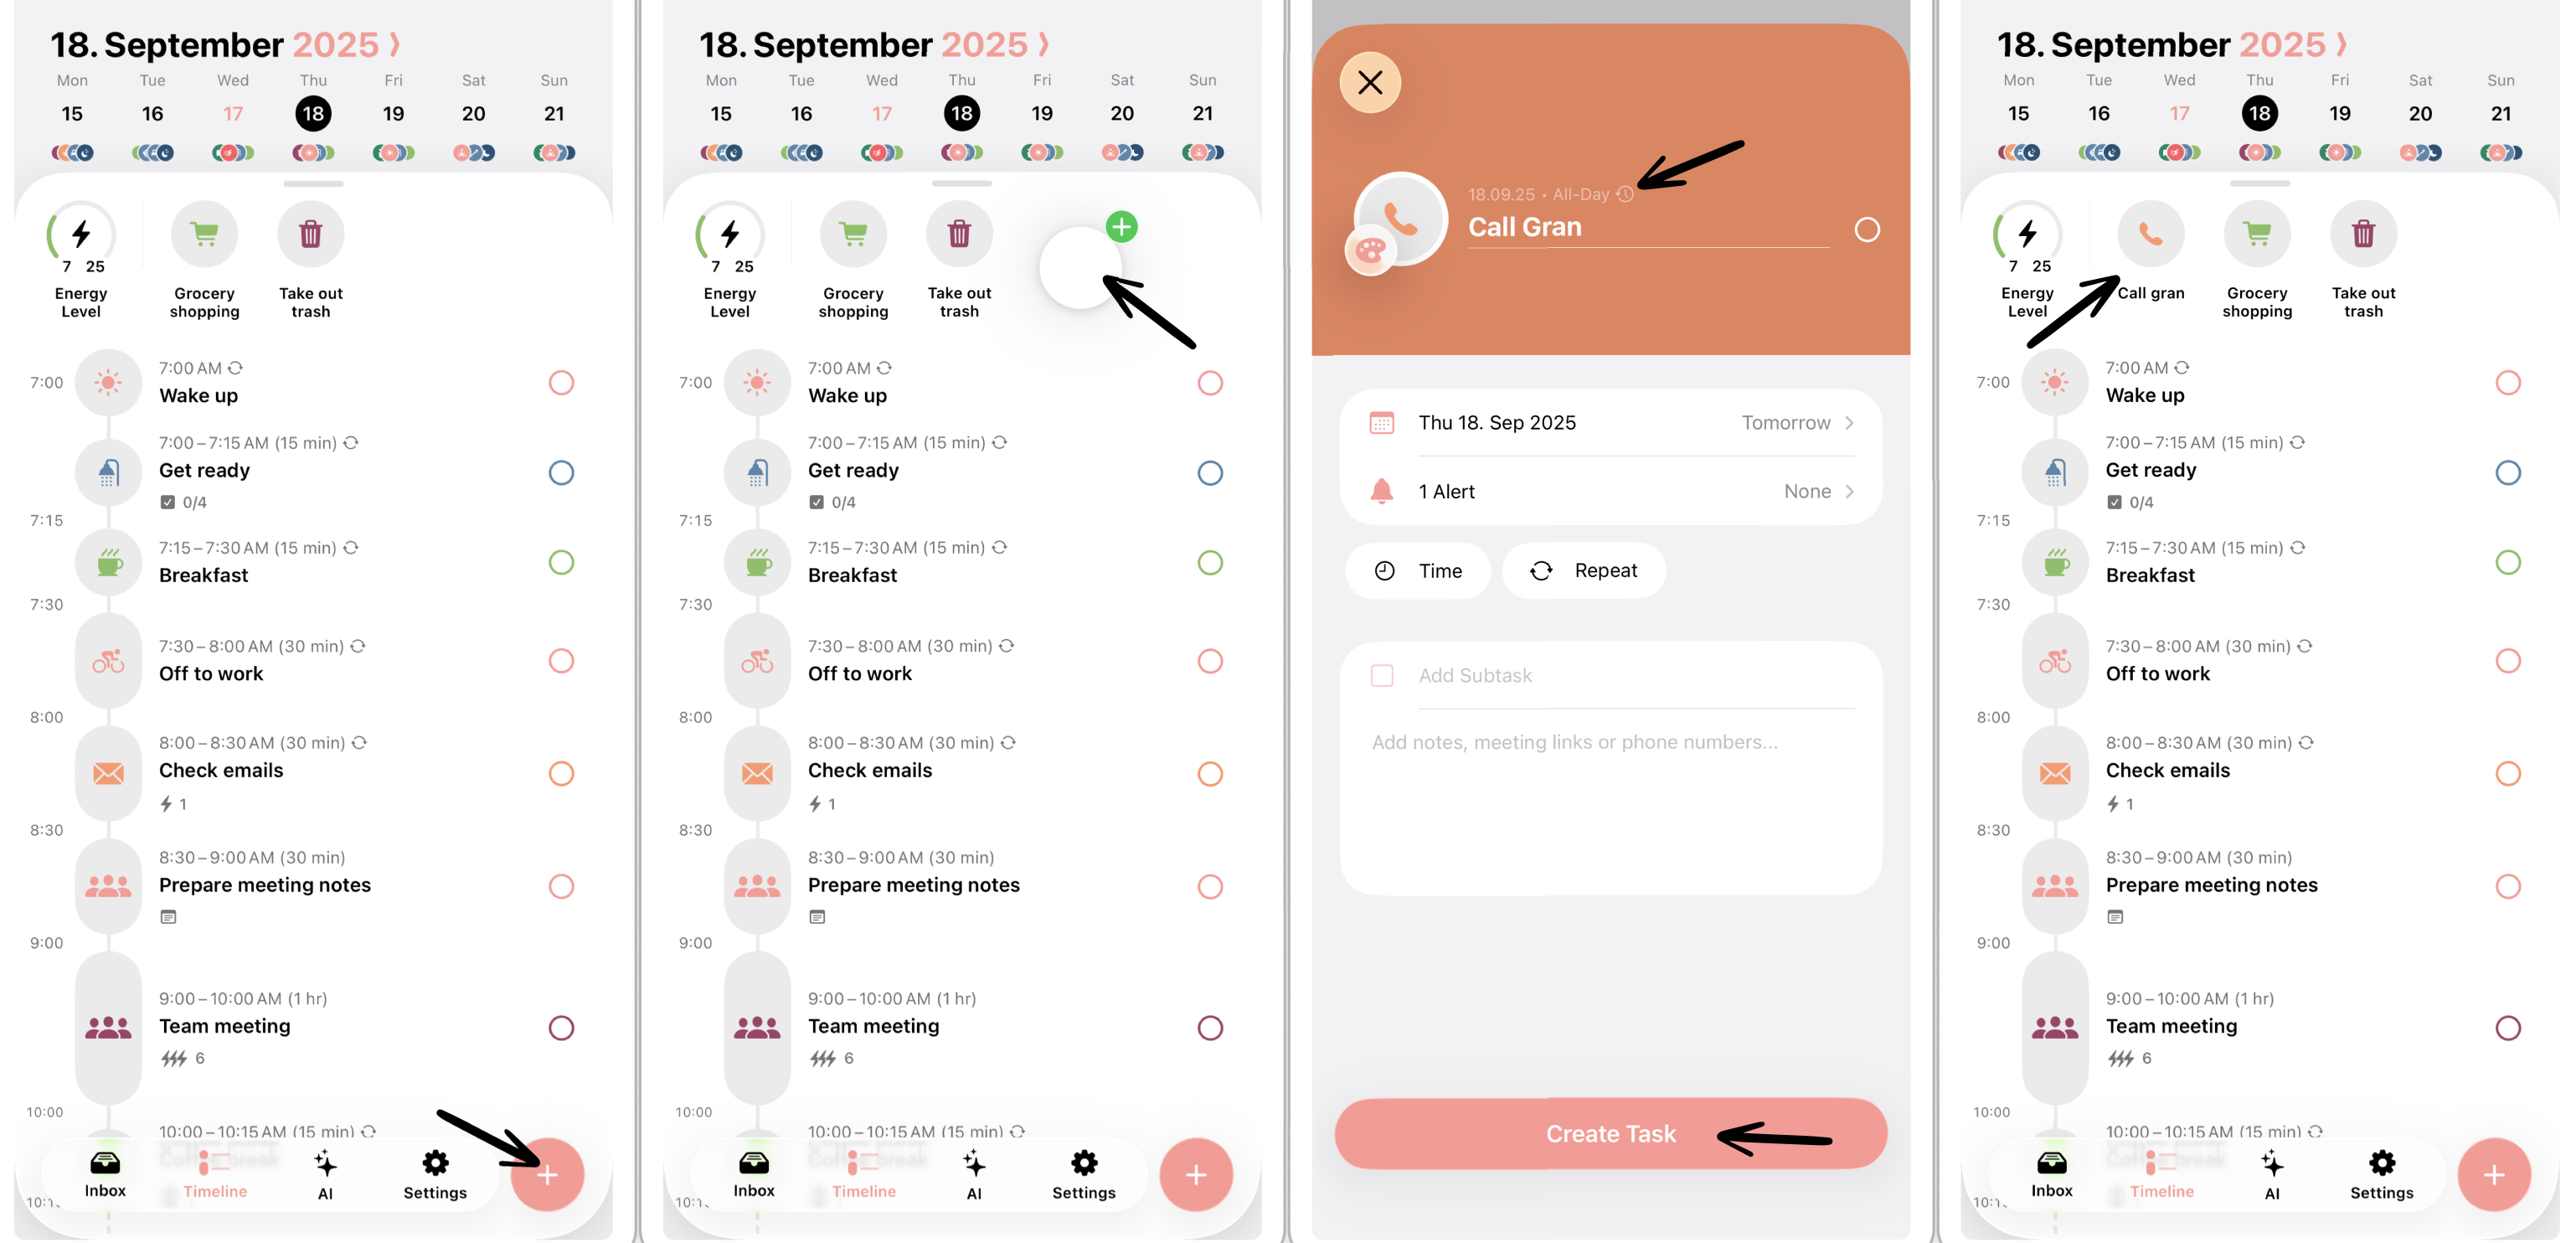
(3.2) Create All-Day Tasks
To create an all-day task using drag and drop, simply drag the + Plus button in the top-right corner over your all-day tasks section and drop it to start creating the new all-day task.
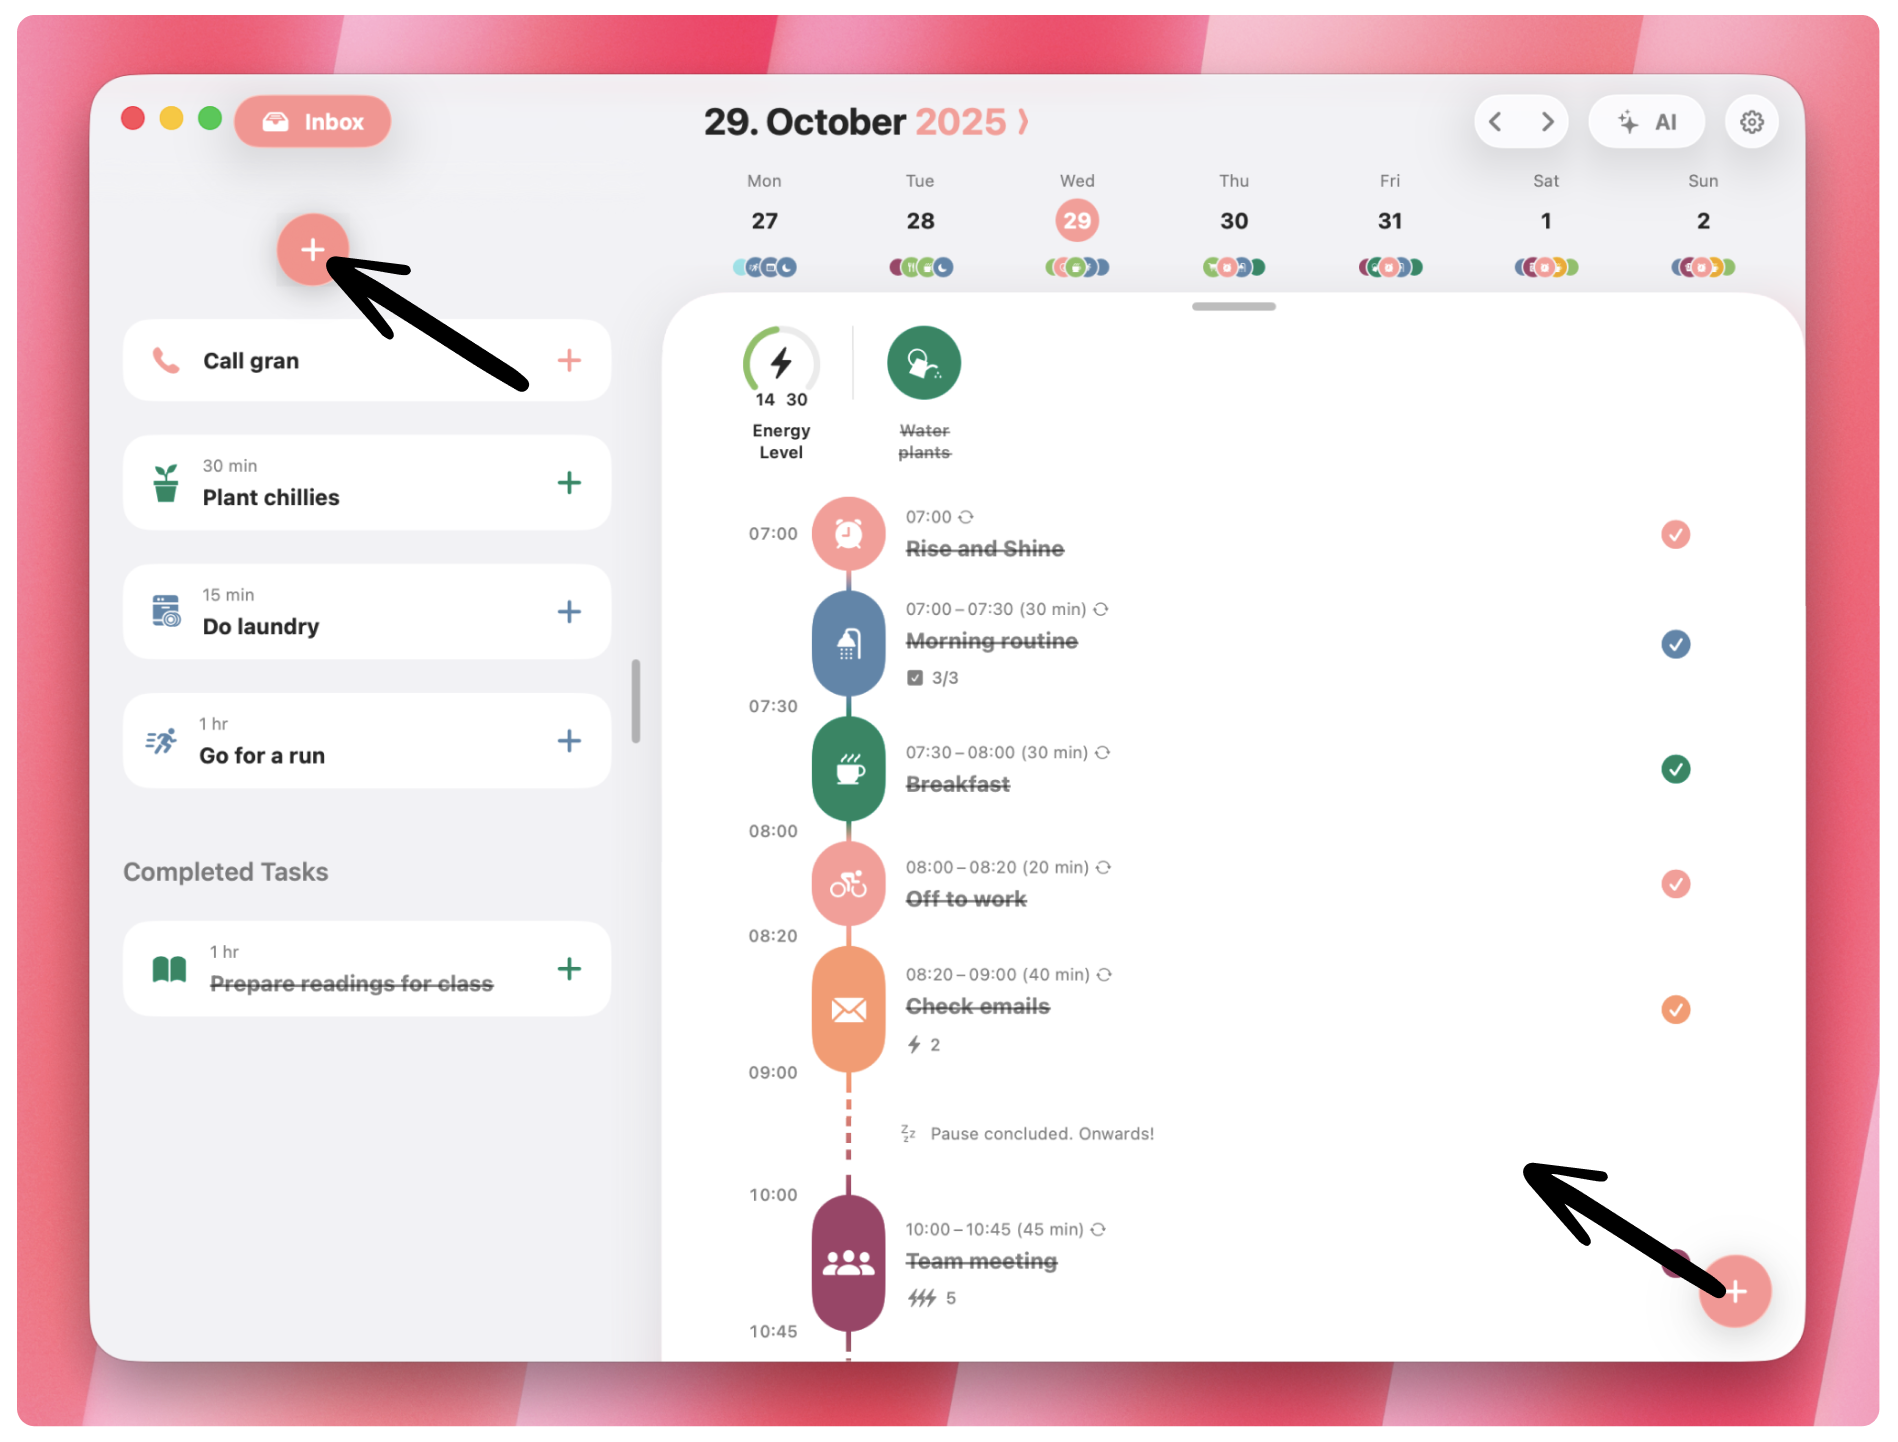
(3.3) Create Inbox Tasks
To create an inbox task using drag and drop, simply drag the + Plus button in the bottom-right corner to the Inbox icon / section. This way, the newly created task will automatically be placed in your inbox.
This is especially useful when attempting to create inbox tasks quickly on Mac or iPad.
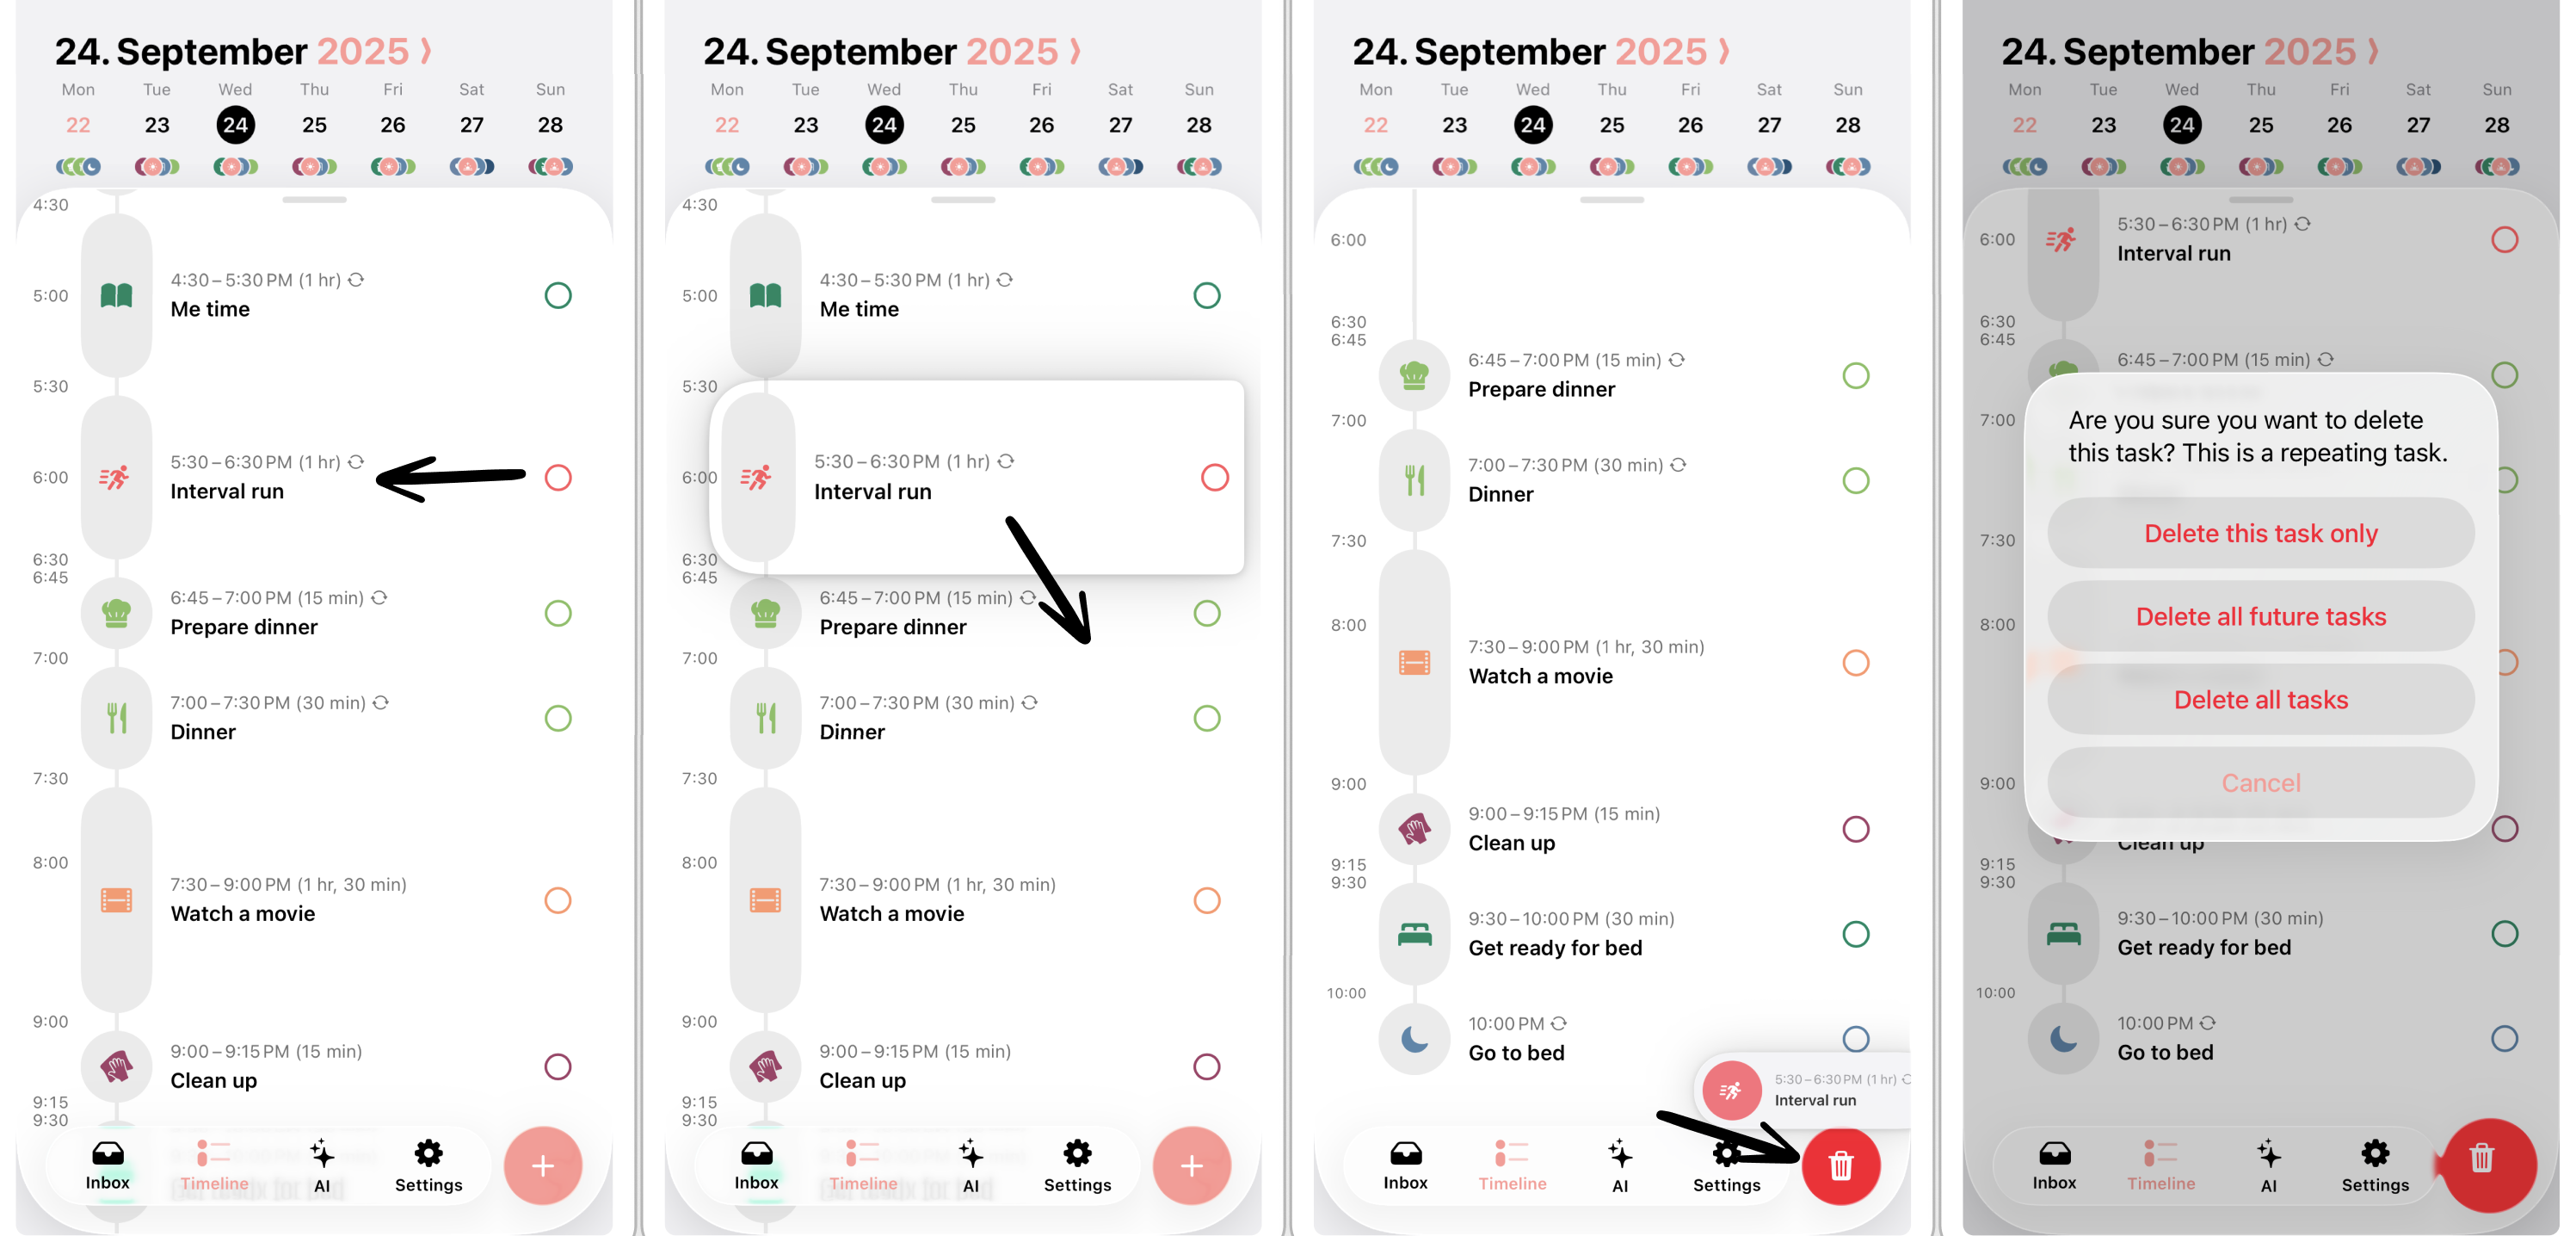
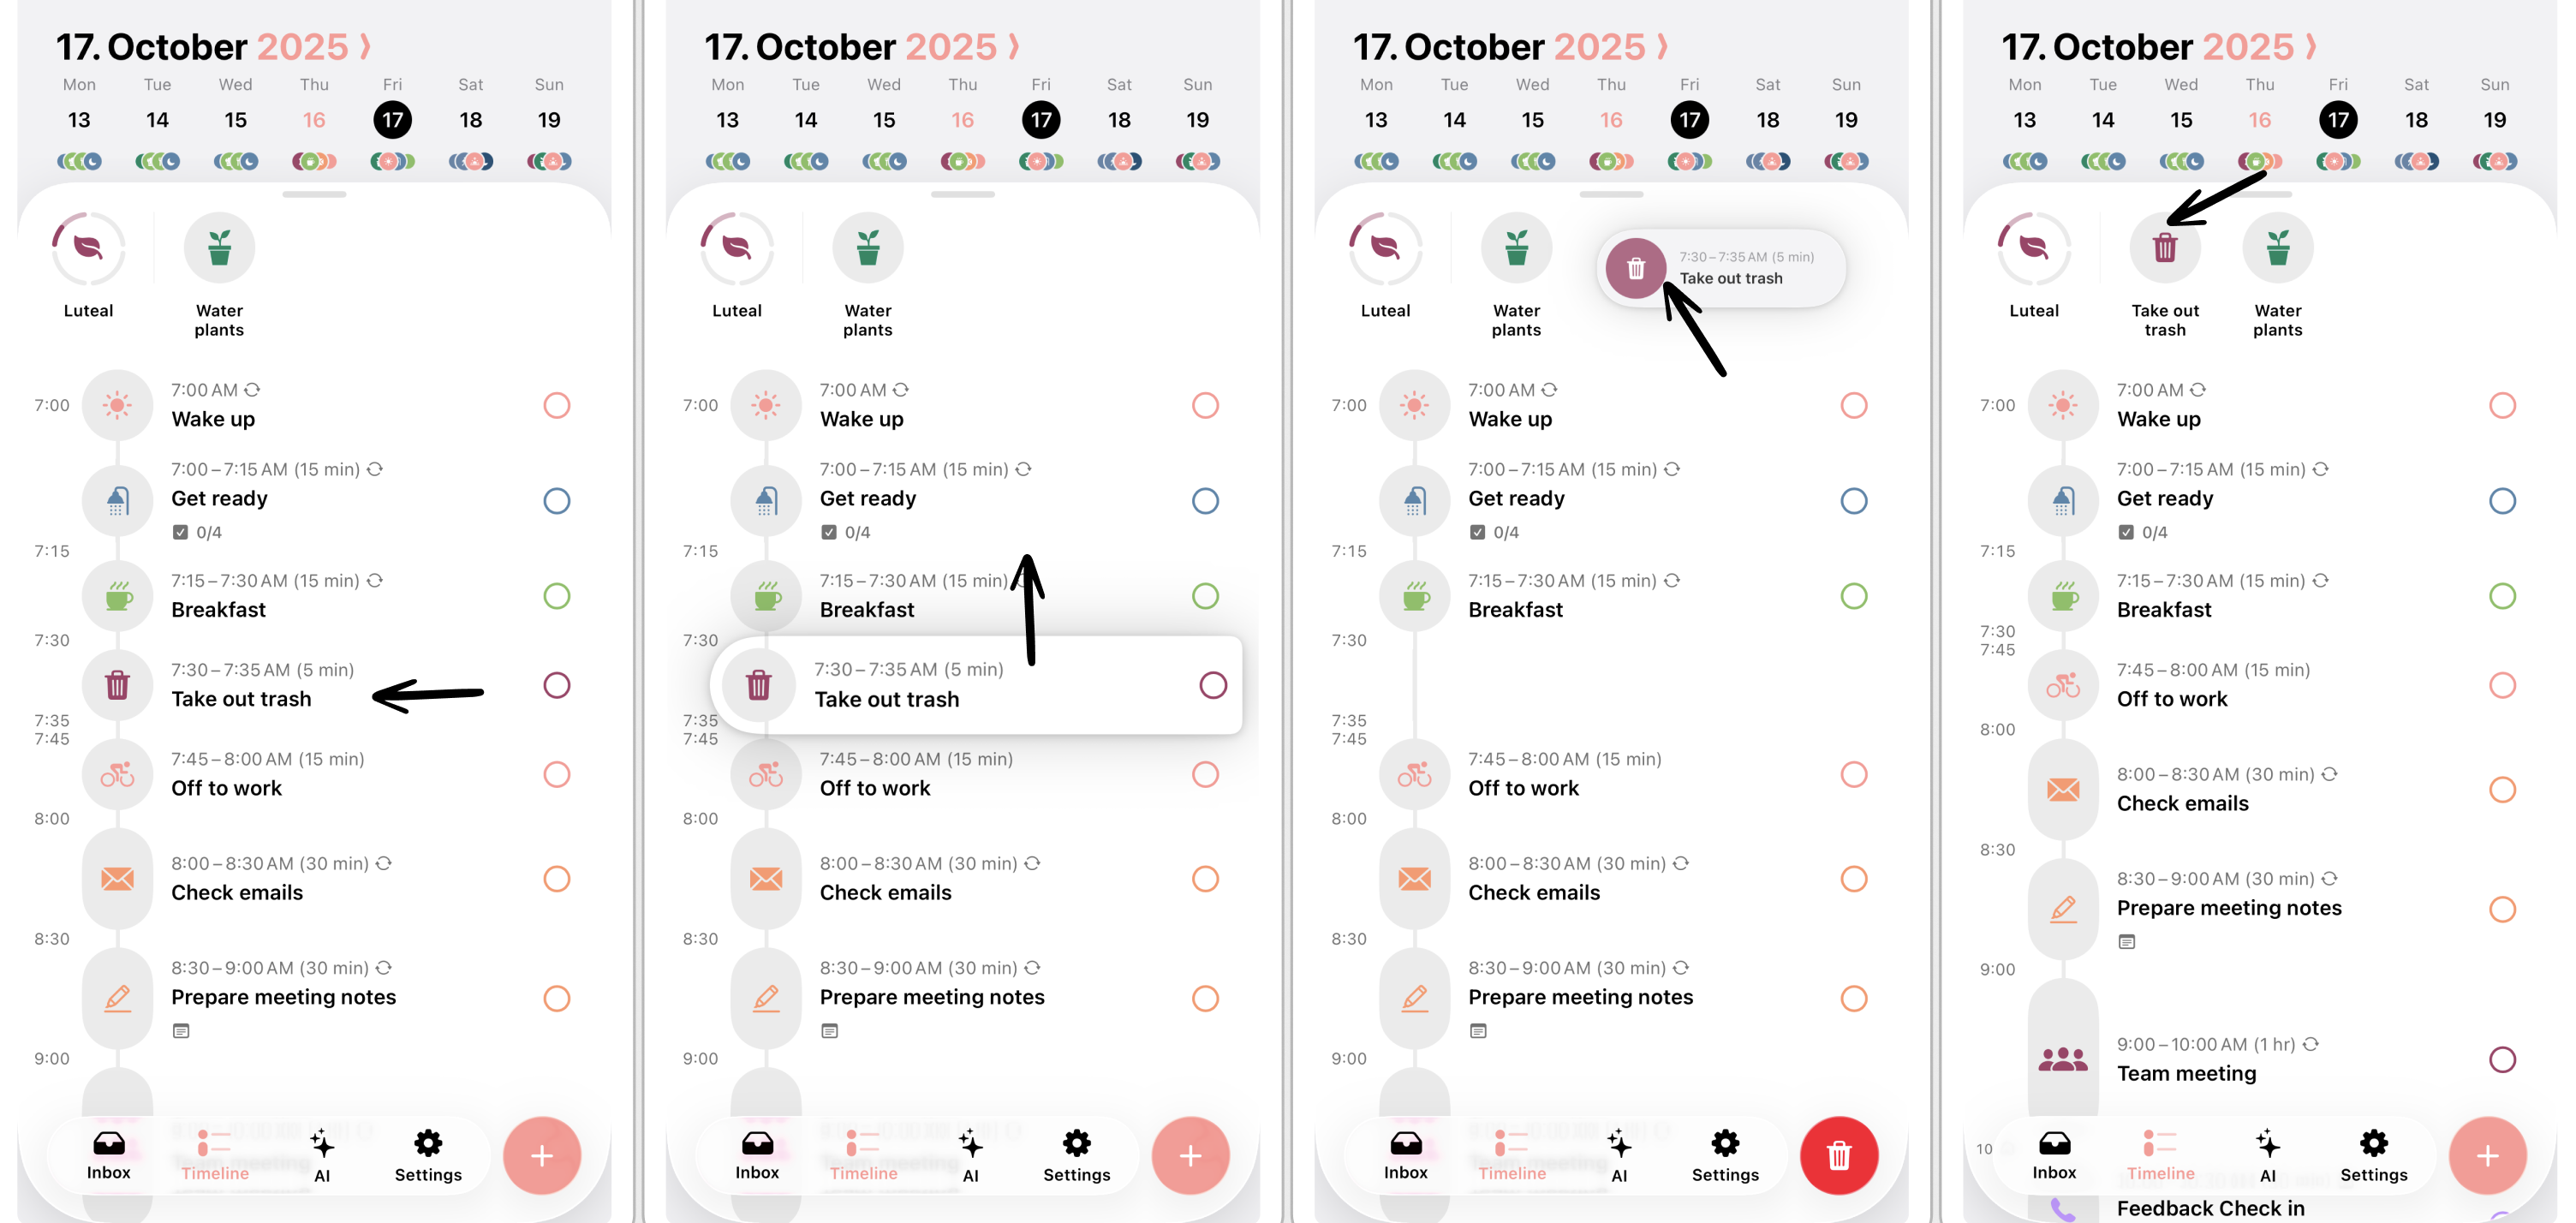
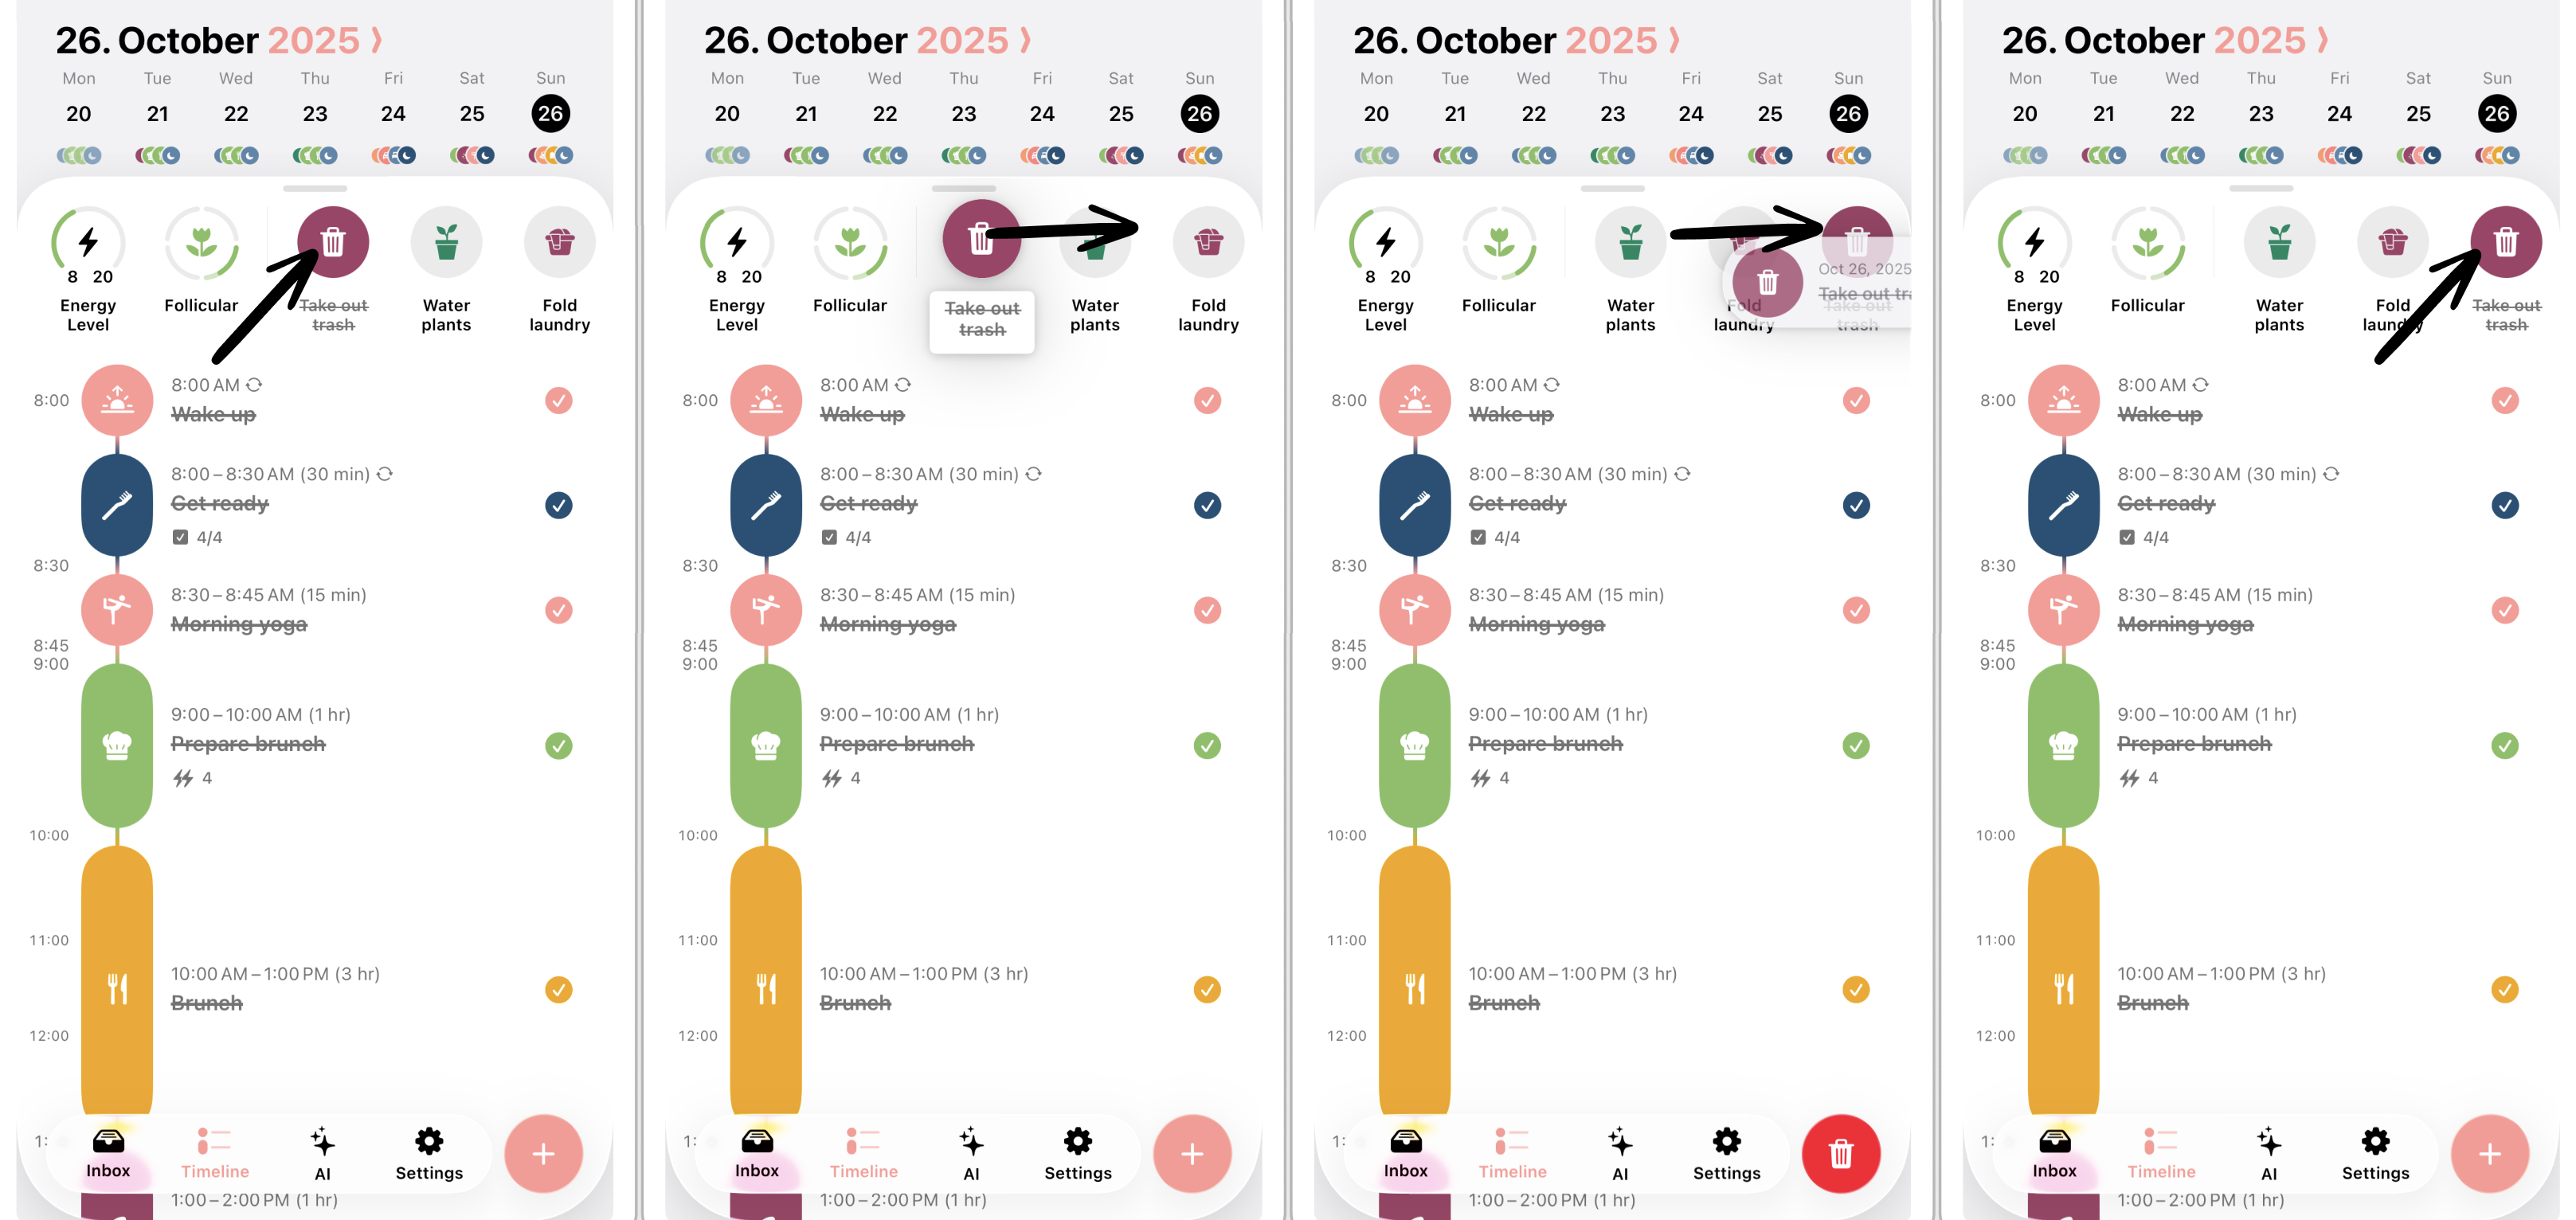
(4) Delete Tasks
To delete tasks quickly using drag and drop, simply drag the task to the bottom-right corner above the plus symbol, where you usually add tasks. The plus button will magically switch to a red trash can symbol. Drop the respective task here.
Please note that this step is irreversible. You cannot recover single tasks. However, you can recover a backup if you created one recently.